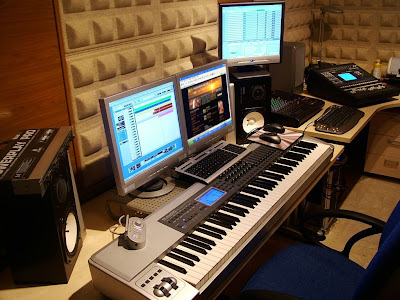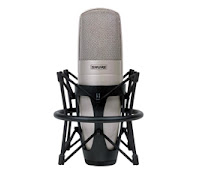
1. We need a computer with a recording software (DAW), a microphone, a XLR cable, a soundcar, if your soundcar has a preamp you can record it through it, but if you haven't got one you need a mic preamp to obtain a correct signal level.
2. We have to connect the microphone to the audio interface and setting levels apropiately (be careful when connecting the microphone to the computer).
3. Once you've configured that, then it enters the analog to digital converter, an essential part of the interface. The digital signal continues on to our computers and into our DAW, or digital workstation. Once in the DAW the sound is manipulated in a variety if ways and is mixed with all the other tracks.
Select a microphone:
- There are two basic types of microphones, dynamic and condenser:
- Dynamic microphones are versatile and robust. They can be used to record voices and instruments.

- Condenser microphones are the professional choice for recording. These have a wider frequency response and better range than dynamic microphone. Condenser microphones capture details of the source you are recording. There require power phantom, wich can be provided by the soundcard.
Position of the microphone:
- Once you' ve chosen the microphone you have to decide the better place to put it. This
step is very important and is not as easy as it sounds.
- Before placing the microphone you should hear sound source. It seems obviously but you have to use your ears. Get up and move around trying to capture the changes in tone. Other factors that will influence the size of the room you're recording and the surface of the walls, floor and ceiling of the same. These details can affect the purity, brilliance and reverb of the sound source.
Position of the voice:
- For powerful sound of voice, we trie to place the microphone about six inches from the mouth of the singer. For a more intimate sound, the singer tries to locate closer to the microphone, but we have to be careful with pops and sounds produced by the lips.
- Use a pop filter is a good idea. If you do not have one, you can remove the microphone pops making is angled against the singer's mouth instead of this point directly there, but beware that this angle is not too large, as this may cause a degradation in frequency response, unless you work in a microphone omni pattern.
- The way you sing means everything to the vocal takes, so I recommend passing up the topic and not stop the singer to overdub or "punch" a lot. This will make it sound more natural. Record multiple takes on different channels, so you can hear them, pick the best, and then edit them to form a single channel. It is therefore advisable to leave intact the original voice channels until armes a mixture of voice you're really satisfied. Only then you can remove the original voice channels.
During recording:
- Some EQ and compression can help voice settled
- During recording light settings are often used, the goal at this stage is usually little nuances that will make adding, leaving more aggressive processing to the mix.
- For equalization, consider applying enhancements / dB attenuations few (2-3) in the equalizer, which nuance or enhance some aspect of the voice. If you find yourself having to equalize over 6 dB to eliminate a problem, it's time to think again about the micro and prior chosen (or singer). That said, it is not uncommon to have to use a notch filter to remove any unwanted harmonic (if inserted as a plugin, you can always remove it later). Of course, if you have clear sound you want, do not be afraid to go for it and burn it. The advice we are giving is opting for one side caution, that leaves open more possibilities for mixing.
- As for compressors, when used in recording reductions are often used about 3-6 dB gain, with attack and release times are not very aggressive. Again, the goal is to establish a lightweight control, rather than an effect of excessive compression during recording.
After recording:
When we have finished recording a voice, or at least part of it, we got a very interesting part that I would have loved to explain, mastering, but the issue of "how to record a voice" unfortunately comes up here. I tried not to dwell much with explanations and be as specific as possible, I have not given too much technical details because I don´t wanted to mix too much information from other lessons. Thank you very much for reading.
Itziar Déniz, Madrid (Spain)

